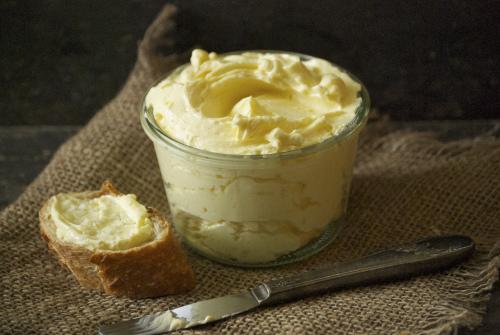
The first time I made homemade butter I was eight years old, sitting in a circle in Mrs. Peterson’s second-grade class, passing around a quart jar filled with fresh cream from a fourth-grade girl’s family dairy farm.
Each student shook the jar to exhaustion, and then passed it to the next. Hand-to-hand, that jar moved around the circle until it suddenly transformed. Mrs. Peterson spread a bit of that golden butter onto a saltine cracker for each of us to try. It was amazing!
 I still make homemade butter, though not nearly as often as I should. And every time I do, I’m reminded of that first experience, and how incredibly simple it is. You can either shake it in a jar, like I did that first time, or have an easier time by using a stand mixer.
Really good store-bought butter is expensive, so it’s nice to be able to make my own. My version is an organic, grass-fed kind, European-style (meaning it has a higher fat/less water content than traditional American butter). It’s also cultured, which means it has a bit of a tangy flavor. I add a little whole milk yogurt to the cream to achieve this. You can control the level of tanginess by varying how long you leave the mixture out at room temperature. It’s that simple.
As always, use the best possible ingredients you can find. Cream that hasn’t been ultra-pasteurized will give you the best result. Though, if you don’t have access to such ingredients, give it a try anyway. In Minnesota, my favorite cream comes from the Cedar Summit Farm. Their products are organic, delicious, and they are the only 100 percent grass-fed dairy in the state. I grew up on a small dairy farm, so I have a bit of a soft spot for a good one. These guys are the real deal.
I prefer my cultured butter with a bit of sea salt. Remember that your butter will last longer in the refrigerator with salt in it, which acts as a preservative. Since the water content in this butter differs from regular varieties, it might be a good idea not to bake with it. Instead, spread it on bread or fresh corn on the cob and enjoy its unique, robust flavor. I recently bought a flat of strawberries and made some jam. It was absolutely heavenly swiping my piece of bread with butter and then spreading the strawberry jam on top. Pure bliss. Enjoy your butter making experience!

Homemade Cultured Butter
1 pint good quality heavy cream, preferably organic and not ultra-pasteurized
2 tablespoons whole milk organic yogurt
1/2 teaspoon good sea salt, plus more to taste
In a large bowl, whisk the ingredients together and cover with a towel. Let sit at room temperature until your desired level of tanginess is present, about 2 hours or longer. 
When it tastes the way you prefer, pour the mixture into a stand mixer fitted with a paddle attachment, (or into a quart jar with a lid). Turn the mixer on low. Then wait and watch for a few minutes until the mixture first becomes somewhat fluffy and homogenous, and then starts to separate.
The buttermilk will separate from the cream. Carefully pour that buttermilk into a container and save it. It
will be amazing used in your favorite pancake recipe.
Next, pour 1/2 cup of ice-cold water into the butter and continue to mix. Pour out the water and discard as it becomes cloudy. Continue to do this until no buttermilk remains in the butter.
The whole process takes about 10-15 minutes. Taste the butter and smooth out with a rubber spatula, add more sea salt, if desired. The more salt in it, the longer it will keep in your refrigerator. Enjoy!


